
12 September 2018
Steps to follow to get Access Key and Secret in Amazon AWS IAM User Console for sending emails
Access Keys (Access Key ID and Secret Access Key)
Access keys consist of an access key ID (for example, VBIDIOSFODNN7EXAMPLE) and a secret access key (for example, fhjkrXUtnFEMI/K7MDENG/EXAMPLEKEY). You can use access keys to sign programmatic requests that you make to AWS if you use the AWS SDKs, REST, or Query API operations. The AWS SDKs use your access keys to sign requests for you, so that you don't have to handle the signing process. You can also sign requests manually.
Using SMTP to Send Email with Amazon SES
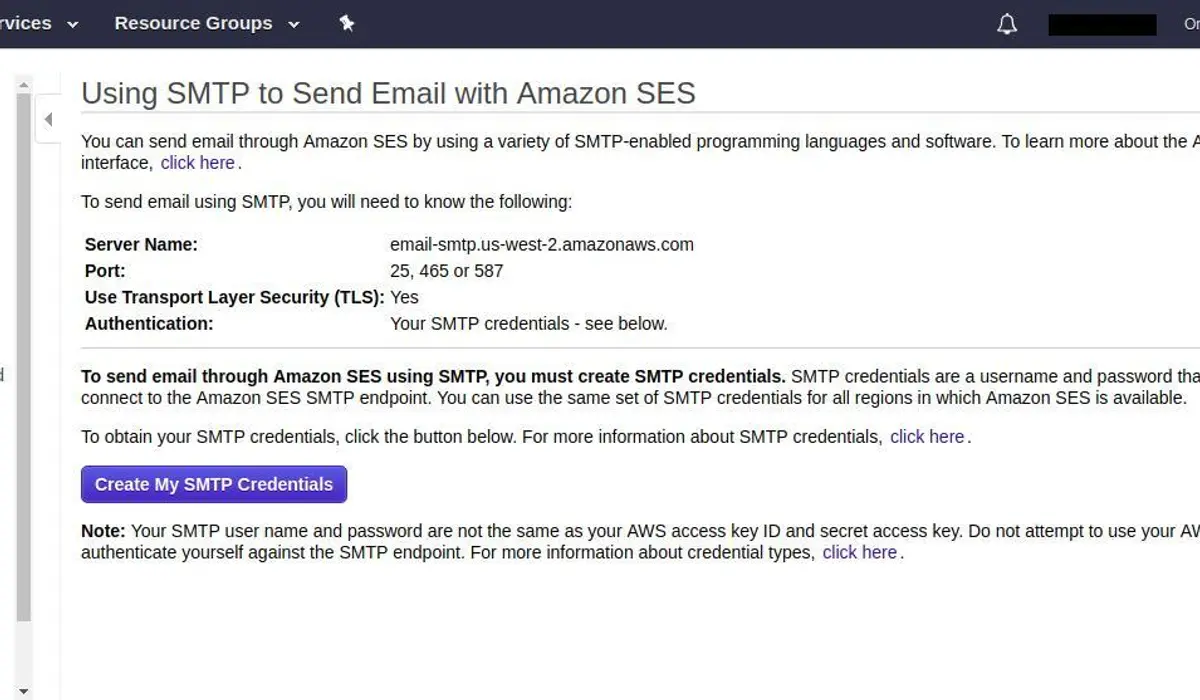
If you are planning to send email through Amazon SES using SMTP, you must create SMTP credentials. SMTP credentials are a username and password that you use when you connect to the Amazon SES SMTP endpoint. You can use the same set of SMTP credentials for all regions in which Amazon SES is available.
Configuring SMTP to send emails in Laravel with Amazon SES
MAIL_DRIVER=smtp
MAIL_HOST=email-smtp.us-west-2.amazonaws.com
MAIL_PORT=587
MAIL_USERNAME=XXXXXXXXXXXXX
MAIL_PASSWORD=XXXXXXXXXXXXX
MAIL_ENCRYPTION=tls
In order for UserActivation to access your Amazon Web Services (AWS) account automatically, the Access Key and the Secret Access Key are required. The Access Key and the Secret Access Key are not your standard user name and password, but are special tokens that allow our services to communicate with your AWS account by making secure REST or Query protocol requests to the AWS service API.
To help secure your account, follow an AWS best practice by creating and using AWS Identity and Access Management (IAM) users with limited permissions.
Using the Amazon SES API to Send Email
Step 1. Create policy
A policy defines the AWS permissions that you can assign to a user, group, or role. You can select what service to be allowed with the policy you are creating.
Step 2. Create User and AWS access type
Access type
Programmatic access
Enables an access key ID and secret access key for the AWS API, CLI, SDK, and other development tools.
AWS Management Console access
Enables a password that allows users to sign-in to the AWS Management Console.
Step 3. Set permissions for the user
You can add user to group, Copy permissions from existing user or Attach existing policies directly to the user. So here we will add the policy which we created in step 1 to the user.
That's all, create your user and get your Access Key ID and Secret Access Key.
Where to find your AWS Access Key?
1.Log in to your AWS Management Console.
2.Click on your user name at the top right of the page.
3.Click on the My Security Credentials link from the drop-down menu.
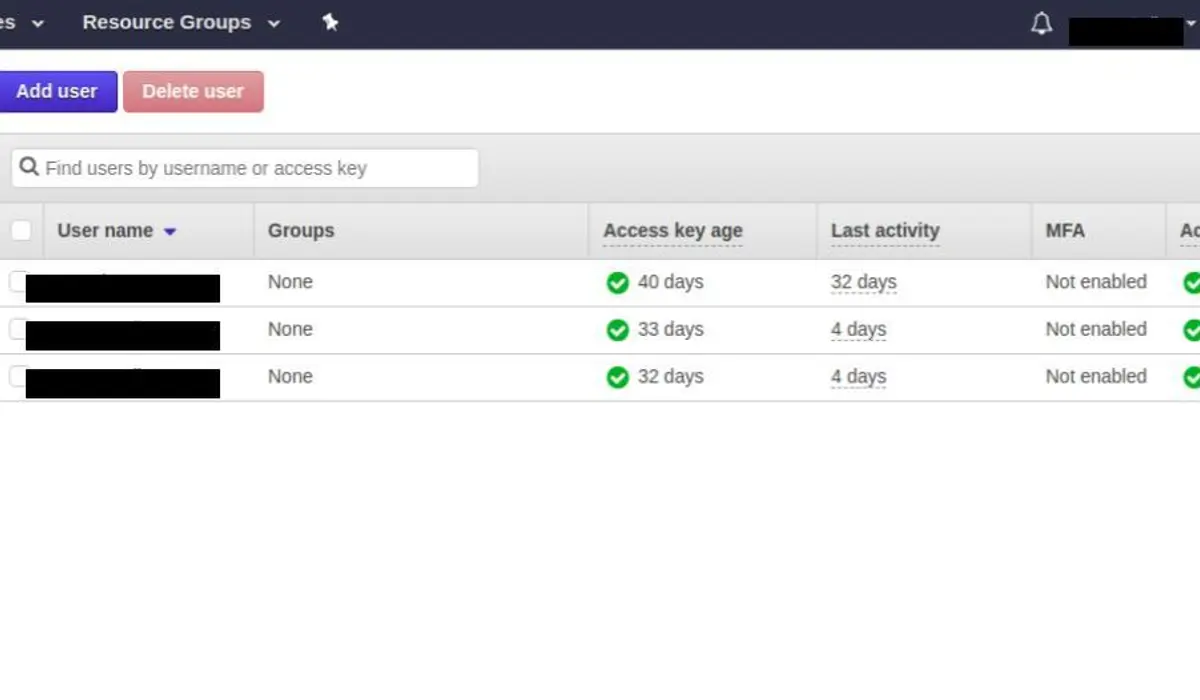
4.Click on users and go to username for whom you want to get the Key.
5.Click on Security credentials section, and copy the latest Access Key ID.
Note: The Secret Access Key will be shown only once at the time of creation and can be viewed or downloaded. You cannot recover them later. However, you can create new access keys at any time.
Summary, Creating Amazon IAM Users Console
Step 1: Create the user in the AWS Management Console
Create the user in the AWS Management Console or from an AWS CLI, Tools for Windows PowerShell, or IAM API command. If you create the user in the AWS Management Console, then steps 1ââ¬â4 are handled automatically. If you create the users programmatically, then you must perform each of those steps individually.
Step 2: Create credentials for the user
Create credentials for the user, depending on the type of access the user requires:
Programmatic access: The IAM user might need to make API calls or use the AWS CLI or the Tools for Windows PowerShell. In that case, create an access key (an access key ID and a secret access key) for that user.
AWS Management Console access: If the user needs to access AWS resources from the AWS Management Console, create a password for the user.
As a best practice, do not create credentials of a certain type for a user who will never need that kind of access.
Step 3: Give the user permissions to perform the required tasks
Give the user permissions to perform the required tasks by adding the user to one or more groups. You can grant permissions by attaching IAM permission policies directly to the user. However, we recommend instead that you put your users in groups and manage permissions through policies that are attached to those groups.
Step 4: Provide the user with the necessary sign-in information
Provide the user with the necessary sign-in information. This includes the password and the URL for the account sign-in webpage where the user enters those credentials. For more information, see How IAM Users Sign In to AWS.
Step 5: Configure multi-factor authentication (MFA) for the user
(Optional) Configure multi-factor authentication (MFA) for the user. MFA requires the user to provide a one-time-use code each time he or she signs into the AWS Management Console.
Step 6: Give users permissions to manage their own security credentials
(Optional) Give users permissions to manage their own security credentials. (By default, users do not have permissions to manage their own credentials.)