How to create custom Security Groups in Amazon AWS
A simple guide on create custom Security Groups in Amazon AWS, the tutorial is a part of our series on How to set up multiple elastic ip for Amazon EC2 Instance.
What is a security group in Amazon AWS ?.
A security group acts as a virtual firewall to control the traffic for its associated instances. To use a security group, add the inbound rules to control incoming traffic to the instance, and outbound rules to control the outgoing traffic from your instance. To associate a security group with an instance, specify the security group when you launch the instance. This is a part of our tutorial series, How to set up multiple elastic ip for Amazon EC2 Instance.
Your VPC comes with a default security group. Any instance not associated with another security group during launch is associated with the default security group. In this exercise, you create a new security group named "WebServerSG", and specify this security group when you launch an instance into your VPC.
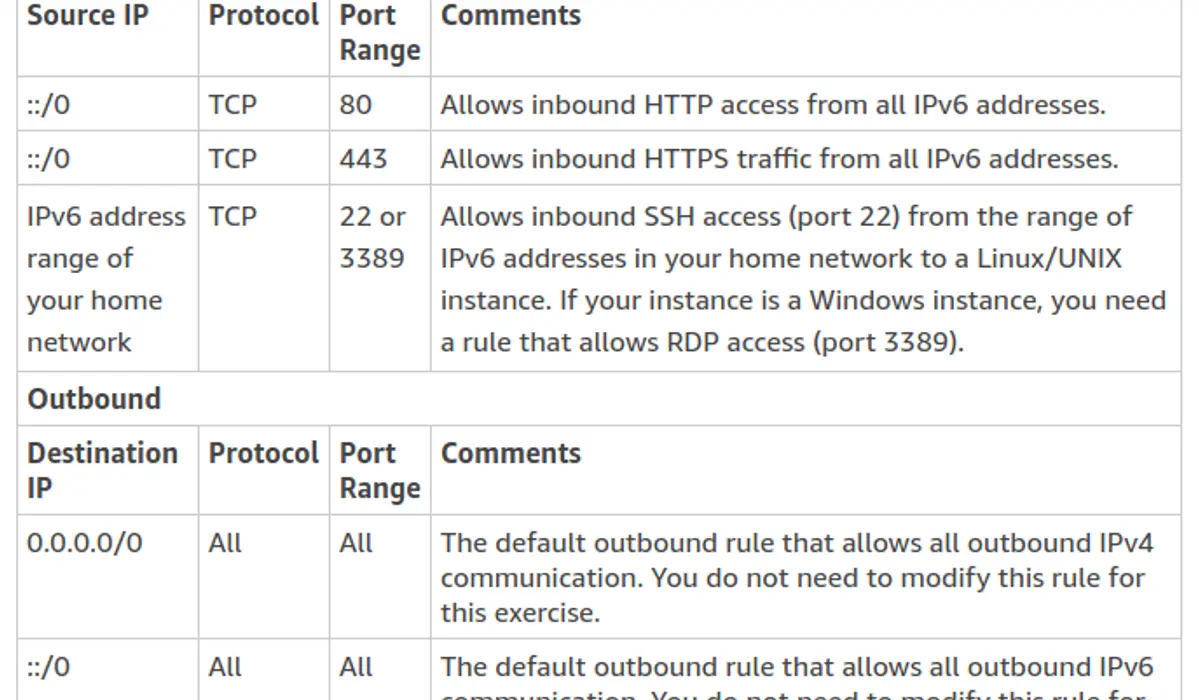
Rules for the Custom Security Group in Amazon AWS
Note
If you want to use your web server instance for IPv4 traffic too, you must add rules that enable access over IPv4; in this case, HTTP and HTTPS traffic from all IPv4 addresses (0.0.0.0/0) and SSH/RDP access from the IPv4 address range of your home network.
Creating custom Security Group in Amazon AWS
1. Open the Amazon VPC console and navigat to Security Groups.
2. Click on Create Security Group.
3. For Group name, enter WebServerSG as the name of the security group and provide a description.
4. Optionally use the Name tag field to create a tag for the security group with a key of Name and a value that you specify.
5. Select the ID of your VPC from the VPC menu and choose Yes, Create.
6. Select the WebServerSG security group that you just created (you can view its name in the Group Name column).
7. On the Inbound Rules tab, choose Edit and add rules for inbound traffic as follows:
- For Type, choose HTTP and enter ::/0 in the Source field.
- Choose Add another rule, For Type, choose HTTPS, and then enter ::/0 in the Source field.
- Choose Add another rule. If you're launching a Linux instance, choose SSH for Type, Enter your network's public IPv6 address range in the Source field. If you don't know this address range, you can use ::/0 for this exercise.
Note
If you use ::/0, you enable all IPv6 addresses to access your instance using SSH or RDP. This is acceptable for the short exercise, but it's unsafe for production environments. In production, authorise only a specific IP address or range of addresses to access your instance.
8. Choose Save.