Connecting MySQL Database Engine on Amazon EC2 from MySQL WorkBench
A simple tutorial on connecting DB Instance Running MySQL Database Engine on Amazon EC2 from MySQL WorkBench
Steps to connect MySQL Workbench with MySQL Database Engine on Amazon EC2
- Launch Amazon EC2 Instance and obtain a new key pair.
- Open MySQL workbench and navigate to Database menu and choose manage connections
- Click on new connection button and navigate to connection tab.
- Click on connection method and select standard tcp/ip over ssh and fill out the parameters.
- Click on Test Connection and make sure connection is successfully made or not.
If you have trouble connecting your instance from MySQL Workbench, try out connecting MySQL from your Ubuntu Terminal. Once you have made successful connection from Terminal, its easy to do the same from MySQL Workbench.
Launch Amazon EC2 Instance and obtain a new key pair
Amazon EC2 uses public key cryptography to encrypt and decrypt login information. Public key cryptography uses a public key to encrypt a piece of data, such as a password, then the recipient uses the private key to decrypt the data. The public and private keys are known as a key pair.
To log in to your instance, you must create a key pair, specify the name of the key pair when you launch the instance, and provide the private key when you connect to the instance. On a Linux instance, the public key content is placed in an entry within ~/.ssh/authorized_keys. This is done at boot time and enables you to securely access your instance using the private key instead of a password.
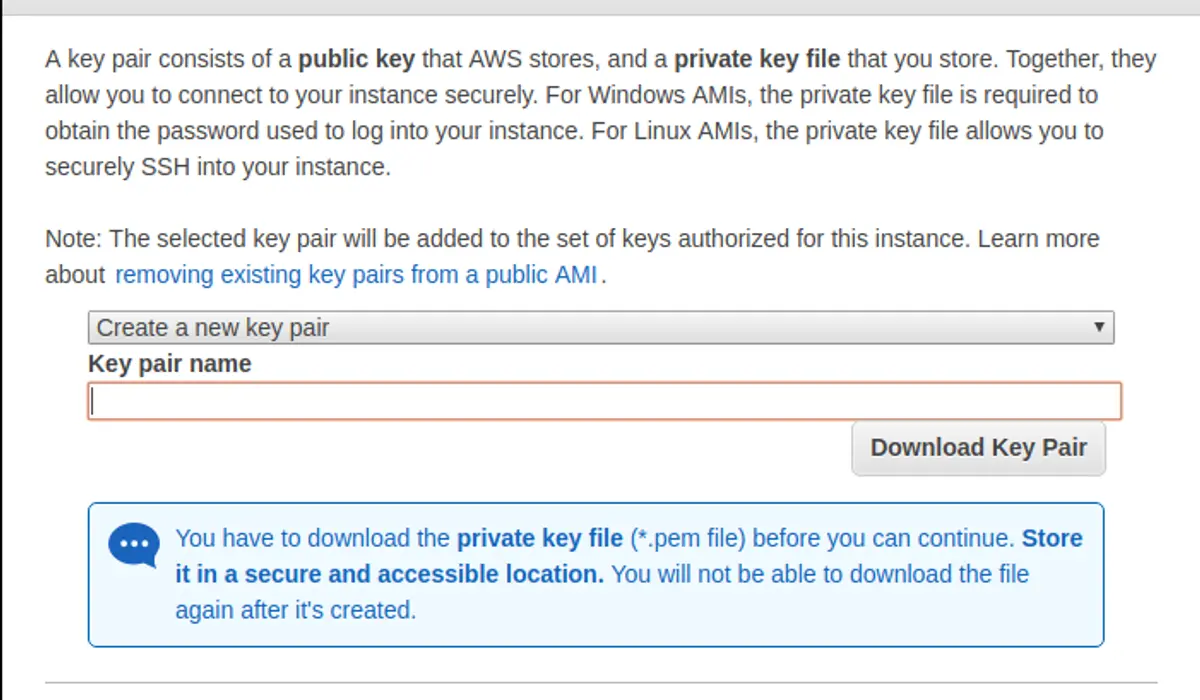
Once you are about to launch a new instance for, you will get a pop up to create new key pair for your instance. You can either choose a existing key pair or create a new one.
This is the only chance for you to save the private key file. You'll need to provide the name of your key pair when you launch an instance and the corresponding private key each time you connect to the instance.
Download the key pair and launch instance. I would suggest to keep the key pair file in your .ssh folder and navigate to the key pair file in the terminal and execute the following command:
chmod 400 your-key-pair-file.pem
This step we are doing so that our key is not publicly visible. Next step is to connect to the instance by following command
ssh -i "your-key-pair-file.pem" ubuntu@ec2-XX-XXX-XX-XXX.ap-xxx-1.compute.amazonaws.comOnce you have made connection from your local machine to Amazon EC2, install MySQL and other programs for your development. If you are trying to install LAMP, try our tasksel for installing LAMP on your Amazon EC2 instance.
If you had missed this step while launching your instance or want to create a new key pair, follow the steps below to generate new key pair file.
Creating a New Key Pair in Amazon EC2 Instance
To create your key pair using the Amazon EC2 console:
- Open the Amazon EC2 console at https://console.aws.amazon.com/ec2/.
- In the navigation pane, under NETWORK & SECURITY, choose Key Pairs.
- Choose Create Key Pair.
- Enter a name for the new key pair in the Key pair name field of the Create Key Pair dialog box, and then choose Create.
- The private key file is automatically downloaded by your browser. The base file name is the name you specified as the name of your key pair, and the file name extension is .pem. Save the private key file in a safe place.
- If you will use an SSH client on a Mac or Linux computer to connect to your Linux instance, use the following command to set the permissions of your private key file so that only you can read it.
chmod 400 my-key-pair.pem
If you do not set these permissions, then you cannot connect to your instance using this key pair. Alternatively, you could use a third-party tool and then import the public key to Amazon EC2. Each key pair requires a name. Be sure to choose a name that is easy to remember. Amazon EC2 associates the public key with the name that you specify as the key name.
Amazon EC2 stores the public key only, and you store the private key. Anyone who possesses your private key can decrypt your login information, so it's important that you store your private keys in a secure place.
The keys that Amazon EC2 uses are 2048-bit SSH-2 RSA keys. You can have up to five thousand key pairs per region.
Connecting MySQL workbench and Amazon EC2 Instance
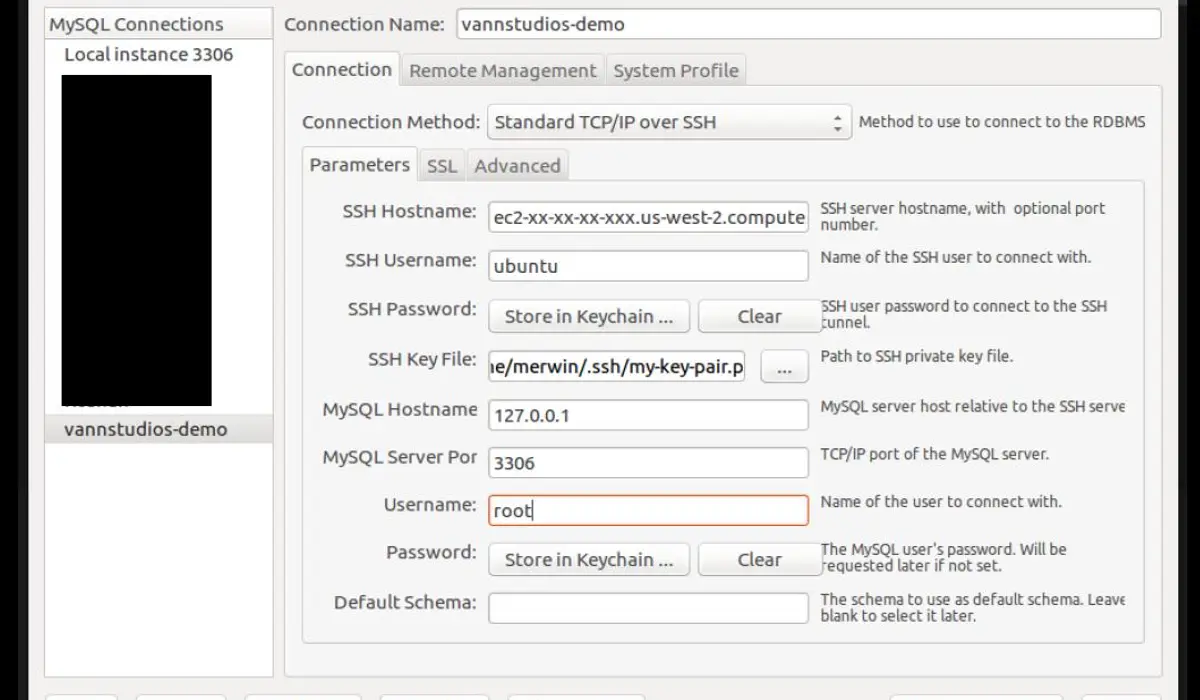
Parameters to fill out in MySQL Workbench Manage Connection Panel
SSH Hostname: can be you instance public DNS or in case if you have an Elastic IP then give your Elastic IP address.
- SSH Username: ubuntu
- SSH Password: not required
- SSH Key File: Link your downloaded key-pair.pem file.
- MySQL Hostname: 127.0.0.1
- MySQL Server Port: 3306
- Username: MySQL user name
- Password: MySQL user password
That's all, now test your connection and enjoy coding. Peace :)
Note:- MySQL Workbench only supports RSA private key not OpenSSH private key when connecting with Standard TCP/IP over SSH.
(You can check the type of private key inside the private key file)
I wasted a lot of my time to figure it out.
Command to convert OpenSSH private key to RSA private key


